

If you’re reading this, you’ve probably decided to step up your system’s cooling game, and a closed circuit cooler is the way to go. I’ve been supplying closed circuit coolers for over 8 years now, and while it’s not rocket science, skipping even one small step can lead to weird hiccups later—like unexpected downtime or higher energy bills. Let’s walk through this install step by step, no jargon, just real stuff I’ve learned from working with customers who’ve nailed it (and a few who messed it up).
First, let’s make sure we’re on the same page about what a closed circuit cooler actually is. Unlike an open cooling tower that lets water evaporate directly into the air, a closed circuit cooler keeps your process water sealed inside a loop, so it never touches outside elements like dirt, dust, or debris. That makes it way better for sensitive systems—like industrial machinery, data center servers, or even HVAC setups where water purity matters. If you’re still weighing options, you might want to check out our range: we’ve got everything from the standard Closed Cell Cooling Tower to portable models for temporary jobs.

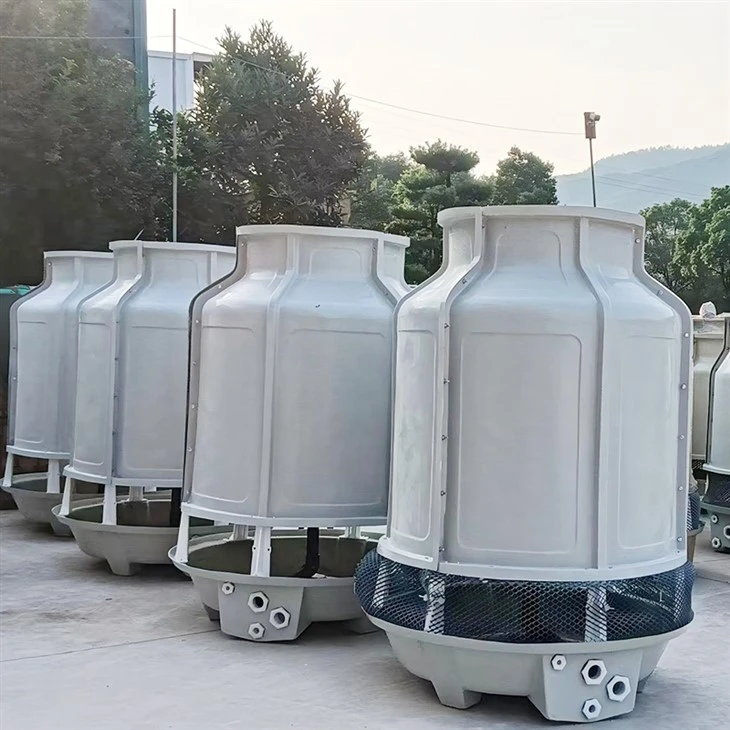
Before you even pick up a wrench, there are pre-install checks that’ll save you hours. Let’s start with space. A lot of guys underestimate how much room a closed circuit cooler needs. You’ll want at least 2 feet of clearance on all sides (front, back, left, right) for airflow, plus 3-4 feet above the unit for exhaust—if that’s blocked, the cooler will have to work way harder than it should, which wastes energy. Also, check the ground: it needs to be level, solid, and able to hold the unit’s weight. A lot of new customers try setting it on soft gravel, and within a few months, the unit’s tilted, pipes are leaking, and they’re calling to complain. Spend the extra money on a concrete pad or heavy-duty steel base—worth it.
Next, pipe sizing and connections. This is another big one. I see people use pipes that are too small because they think it’ll cut costs, but that restricts flow, making the cooler inefficient. Match your pipe size exactly to the unit’s inlet and outlet ports (we list this in every install manual, but feel free to hit us up if you need help measuring). Also, use flexible connectors on both the process side and the water side—when the unit runs, it vibrates a little, and rigid pipes will crack over time. Don’t forget to add isolation valves too; that way, if you need to service the cooler, you can shut it off without draining your whole system.
Then there’s the fan and motor setup. Some models, like the Closed Type Cooling Tower, have multiple fans, so you need to make sure each fan is spinning in the right direction (check the label on the fan housing—most have an arrow showing airflow). If a fan is spinning backwards, it’ll push hot air into the unit instead of pulling it out, and you’ll wonder why your system’s still overheating. Also, before connecting power, spin the fan blades by hand to make sure they’re not hitting any debris (even a small leaf or a loose screw can cause a big problem later).
Now, let’s talk about filling and testing the system. Once the pipes are connected, you’ll need to fill the closed circuit cooler’s secondary loop (the one that holds the cooling water, separate from your process water) with the right fluid. Most of the time, that’s water mixed with a corrosion inhibitor and a biocide—skip the tap water only, because minerals in tap water will build up inside the tubes and reduce heat transfer over time. We always recommend a 50/50 mix of water and ethylene glycol if your area gets cold, to prevent freezing, but check your unit’s manual for exact ratios.
After filling, you’ve got to bleed all the air out of the system. Air bubbles act like insulators, so they stop water from carrying heat away. Most closed circuit coolers have an air vent valve at the top—open that slowly while you fill the loop, and keep going until no more bubbles come out. If you skip this step, the unit’s pressure will be all over the place, and it might shut down unexpectedly.
Once everything’s filled and bled, do a pressure test. Crank the system up to 1.5 times your normal operating pressure (check the manual for that number) and let it run for 2 hours. Watch for leaks at the pipe connections, valves, or gaskets. Small leaks are easy to fix right now; waiting until you turn the system on full blast later will lead to a mess.
One thing a lot of people don’t think about is where to place the cooler for your specific use case. If you need a temporary setup—like for a construction site or a repair job—our Round Portable Cooling Tower is perfect. It’s easy to move with a forklift or a truck, so you don’t have to go through a big permanent install. For high-heat applications, like metal processing or heavy industrial machinery, the High Temperature Round Closed Circuit Tower is designed to handle way hotter process water than standard models, so you won’t stress about overheating. If you’re not sure which type is right for you, check out our page on Cross Flow and Counterflow Cooling Towers to see the difference between airflow designs—cross flow is great for low-noise setups, counterflow is more efficient for high-heat jobs.
Now, let’s talk about common mistakes I see customers make, because even if you follow all the steps, these will mess you up. First, skipping regular maintenance checks. A closed circuit cooler is low-maintenance, not no-maintenance. Every 6 months, check the water level in the secondary loop, clean the air filters (if your unit has them), and inspect the fan blades for damage. Second, ignoring the water chemistry. If you don’t test the water every 3 months, corrosion and scale will build up inside the tubes, and you’ll have to replace the whole unit way earlier than expected. Third, not accounting for weather. If your unit’s outside in a cold climate, make sure you drain the water or add antifreeze during the off-season—burst pipes are way more expensive than a little extra antifreeze.
I’ve had customers call me after their first install saying it’s not working right, and 9 times out of 10, it’s one of these small mistakes. For example, a guy last year installed a closed circuit cooler for his small manufacturing line, used tap water without inhibitors, and within 6 months, the tubes were scaled shut. He ended up having to flush the whole system, which cost him twice as much as the inhibitors would have. Don’t be that guy.
At the end of the day, installing a closed circuit cooler isn’t hard, but it does pay to do it right the first time. If you’re still confused about sizing, placement, or which model is best for your needs, don’t hesitate to reach out to our team. We don’t just sell coolers—we walk you through every step, from install to maintenance, to make sure your system runs smoothly for years. If you’re ready to get a quote or have questions about our range, hit us up to start the conversation. We’re here to help, not just make a sale.
References
- Closed Circuit Cooling Tower Installation and Maintenance Guide, Industry Cooling Equipment Association, 2022.
- Industrial Cooling System Efficiency Best Practices, Global HVAC Research Institute, 2021.
- Water Quality Standards for Closed Loop Industrial Systems, American Society of Mechanical Engineers (ASME), 2020.